This is the 5th entry of the HYCU backup series.
- Part.1 Installing HYCU Backup Controller
- Part.2 Adding Backup Source
- Part.3 Adding Target
- Part.4 Definition of Backup Policy
- Part.5 Backup and Restore VM
In the Part.4 post, I defined Time Window and Backup Policy.
At this time, I'm going to show how to backup and restore VM with HYCU.
※The content of this blog is based on my own evaluation work and knowledge. Please follow the official documentation when actually installing and using the products.
Table of Contents
Environment
Platform: NX-1465-G5
AOS: 6.5.1.5 LTS
AHV: 20201105.30417
Backup tool: HYCU Backup Controller(4.6.0)
Backup source VM: Windows Server 2019
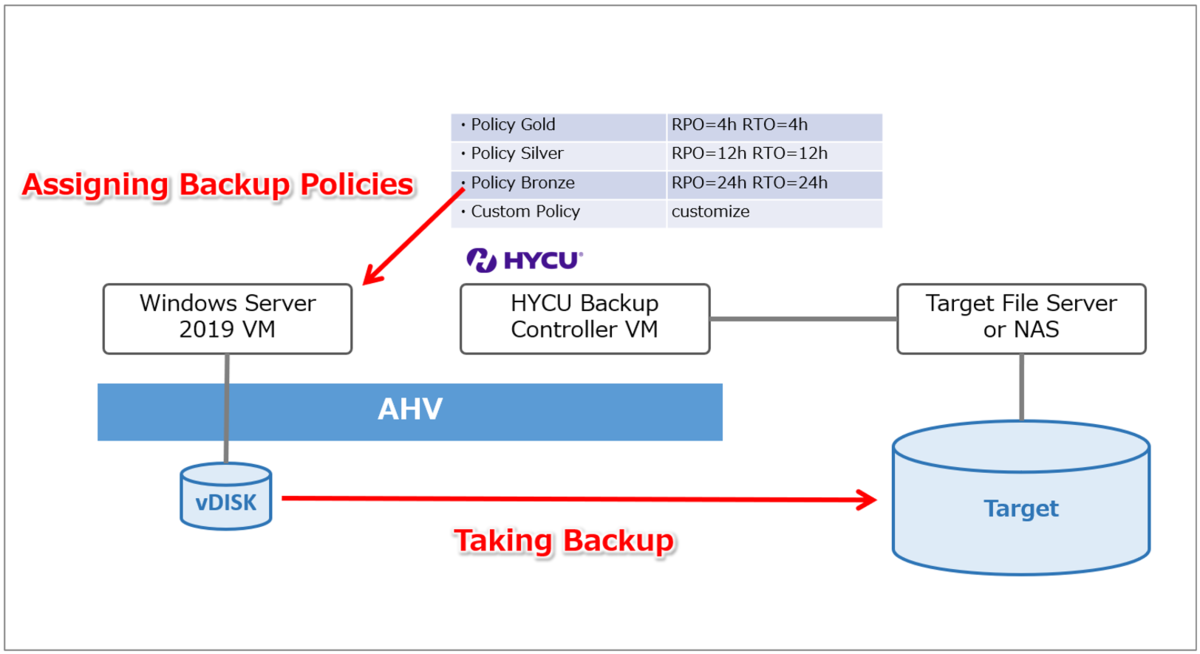
1. Taking Backup
▽Overview
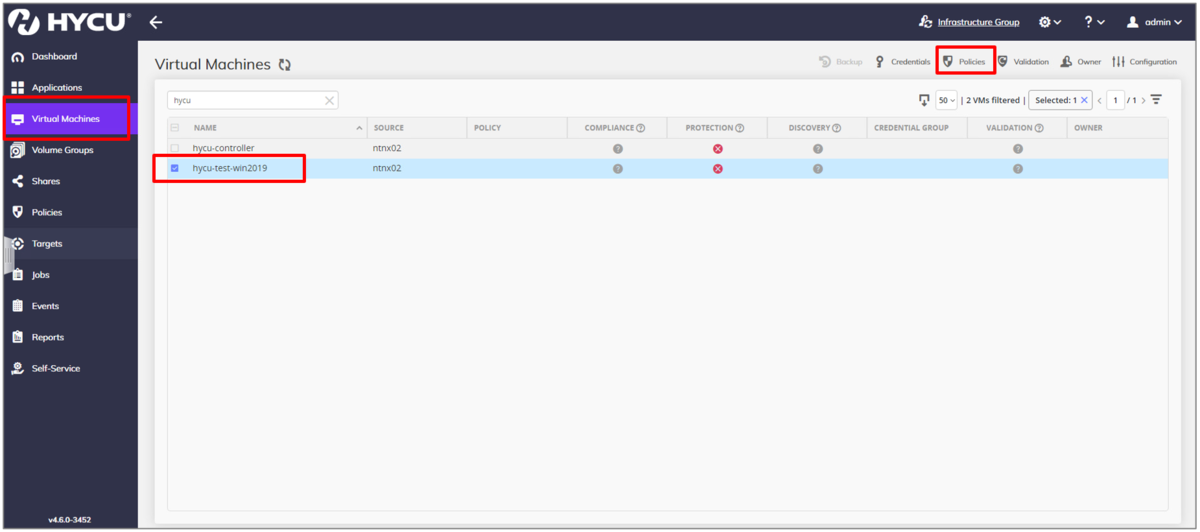
▽Access to Virtual Machines and select the source VM, then click on Policies.
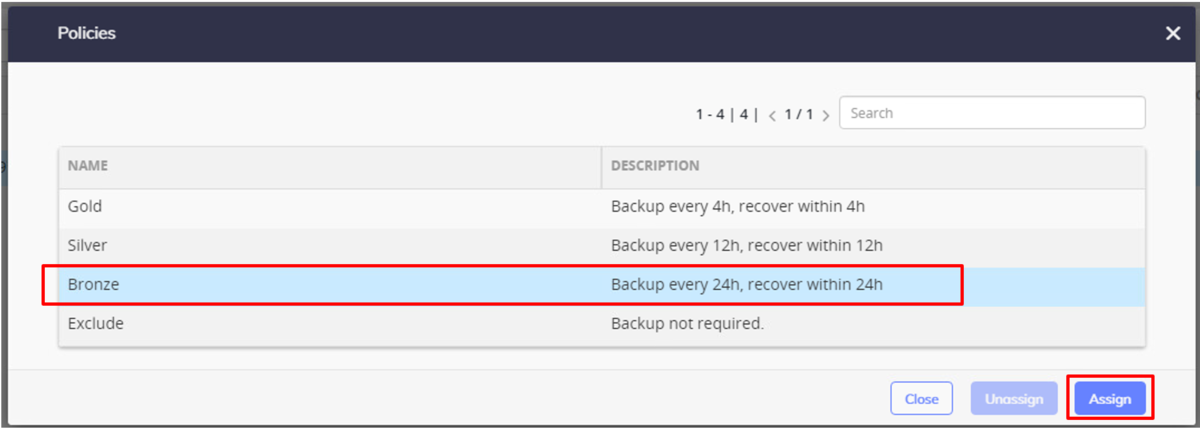
▽At this time, select default Bronze policy and click on Assign.
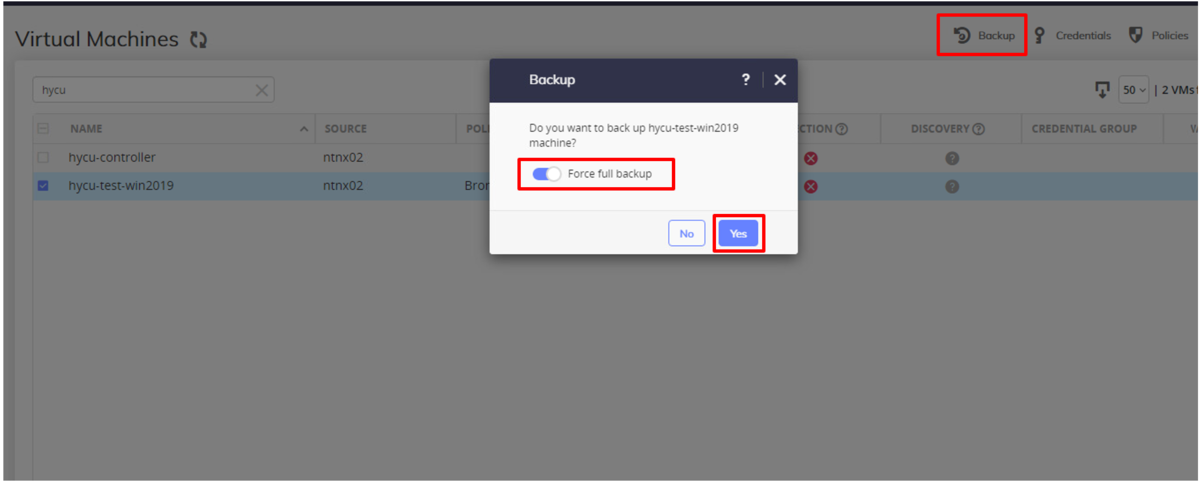
▽Take Manually full backup once.
2. Restore VM
▽Overview

At this time, I'm going to restore the VM as another one on the source AHV cluster.
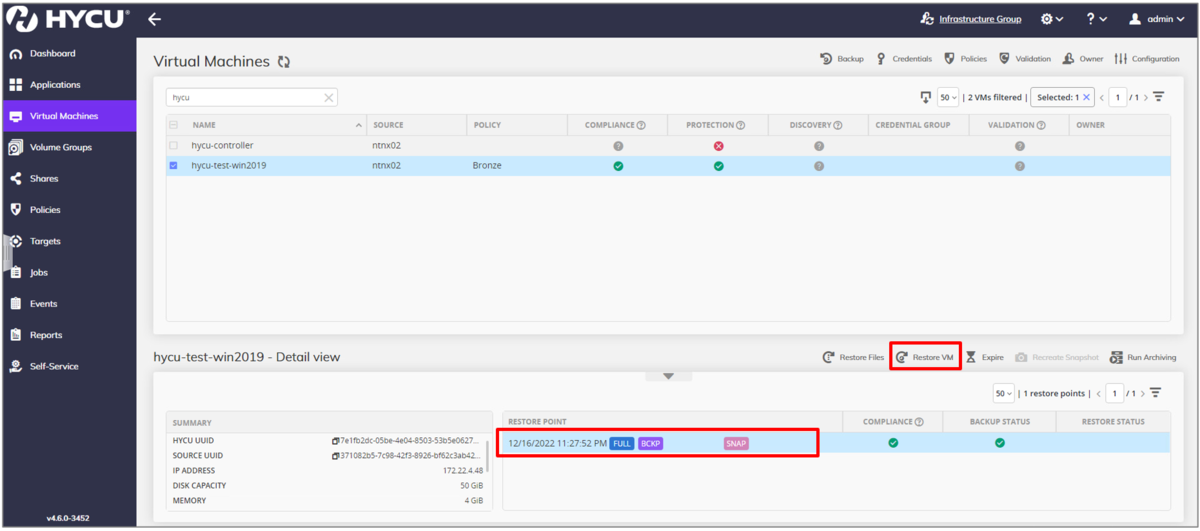
▽Select VM and click on Restore VM.
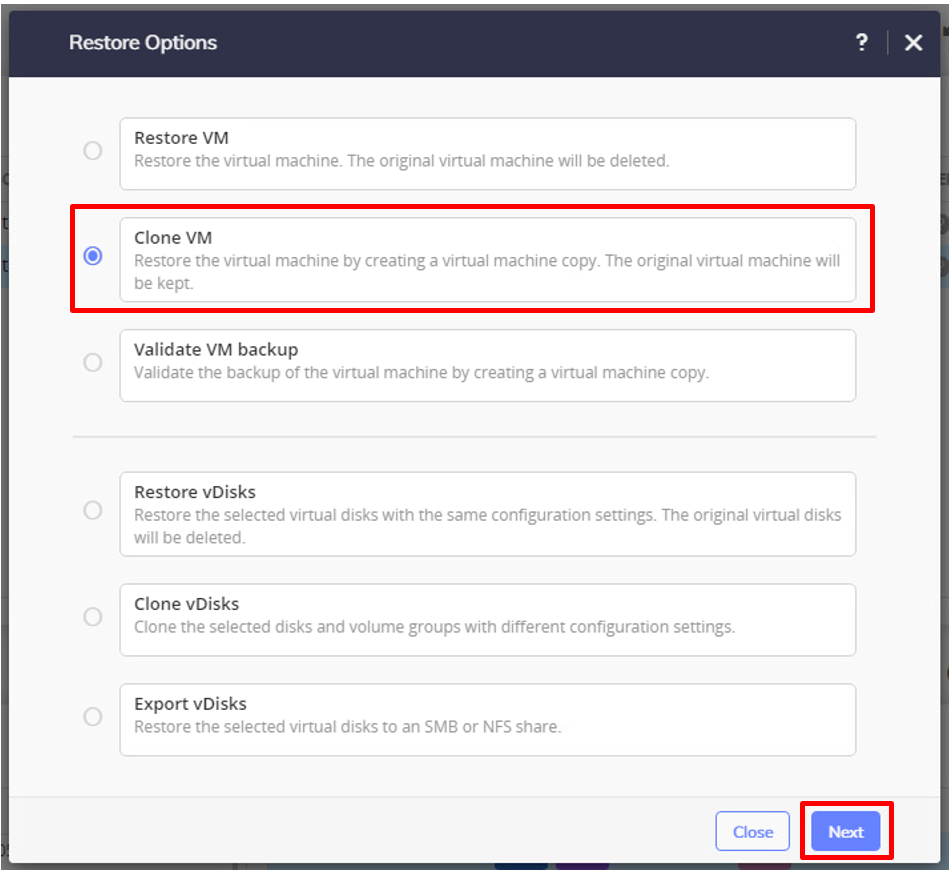
▽Select Clone VM to restore as another VM, and click on Next.
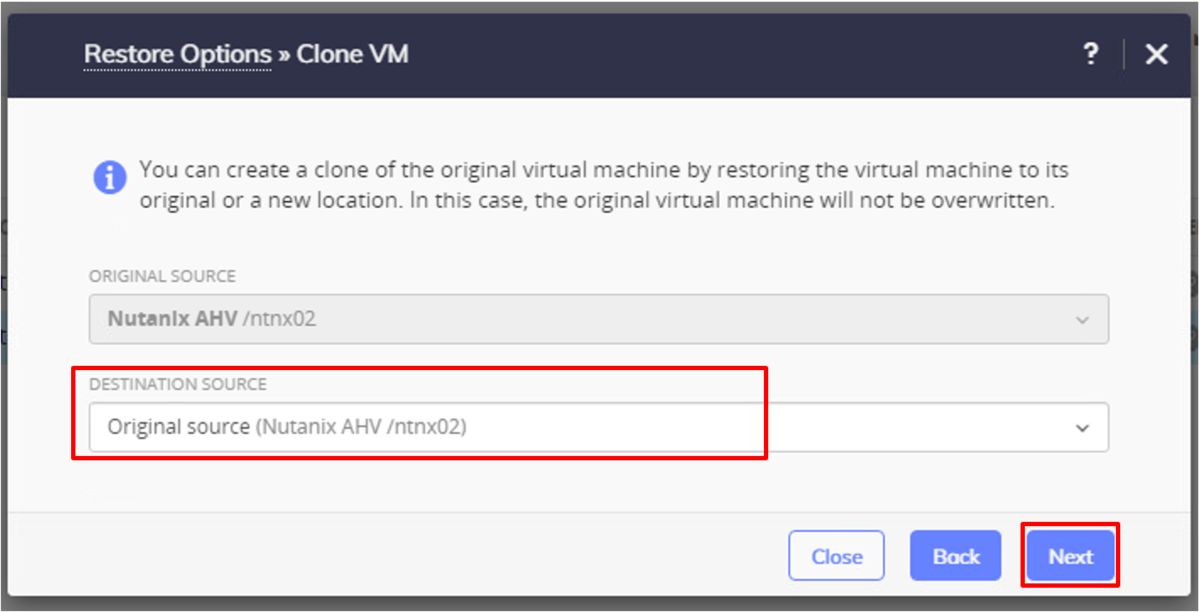
▽Select Original source to restore on the same AHV cluster, then click on Next.
▽Configure Storage Container, VM name, Compute Resource and Network, then click on Restore.
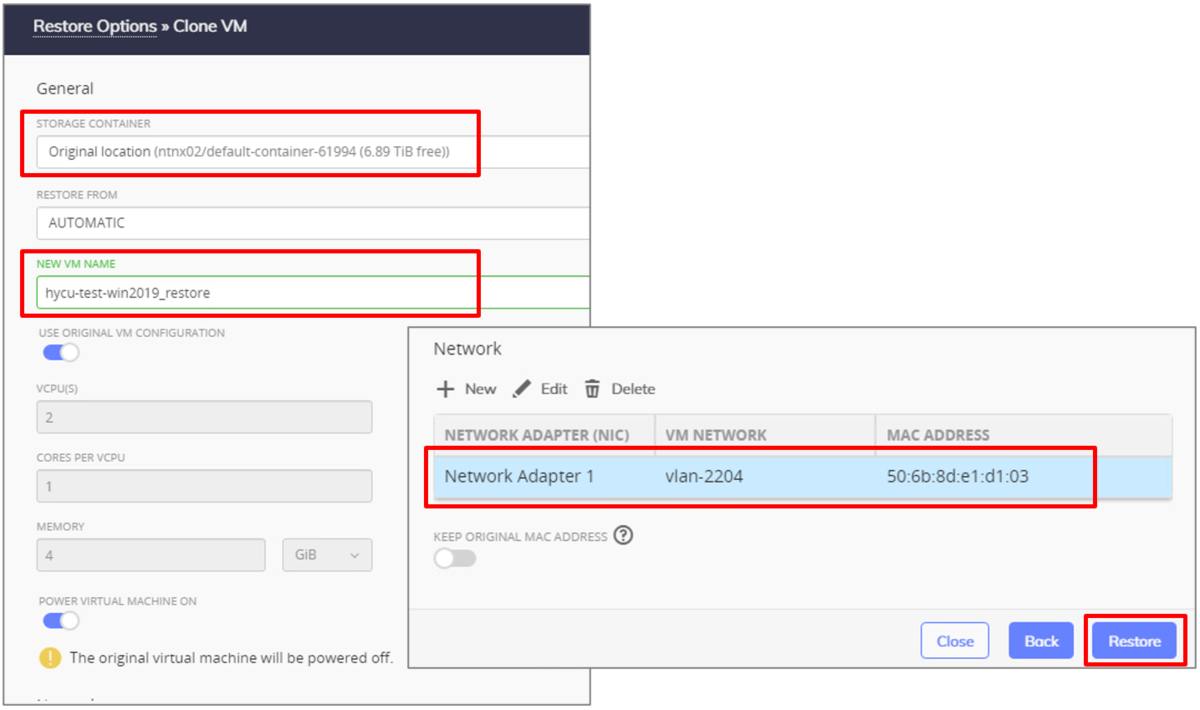
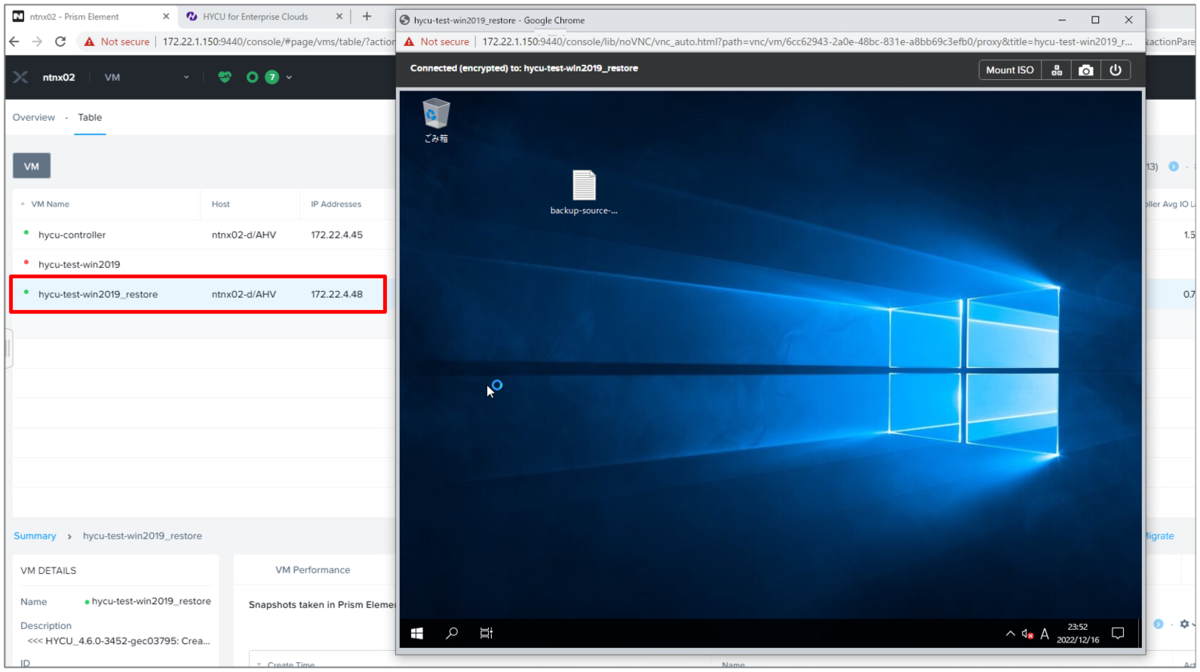
After the restoration completed, you can see the VM on Prism, and can launch console to log on. The IP address was inherited.
Thank you for reading! Hope it will be useful for you!
<Reference>
HYCU User Guide
>>Setting a default policy
>>Performing a manual backup
>>Cloning a virtual machine
https://download.hycu.com/ec/v4.6.0/help/en/HYCU_UserGuide.pdf