This is the 3nd entry of the HYCU backup series.
- Part.1 Installing HYCU Backup Controller
- Part.2 Adding Backup Source
- Part.3 Adding Target
- Part.4 Definition of Backup Policy
- Part.5 Backup and Restore VM
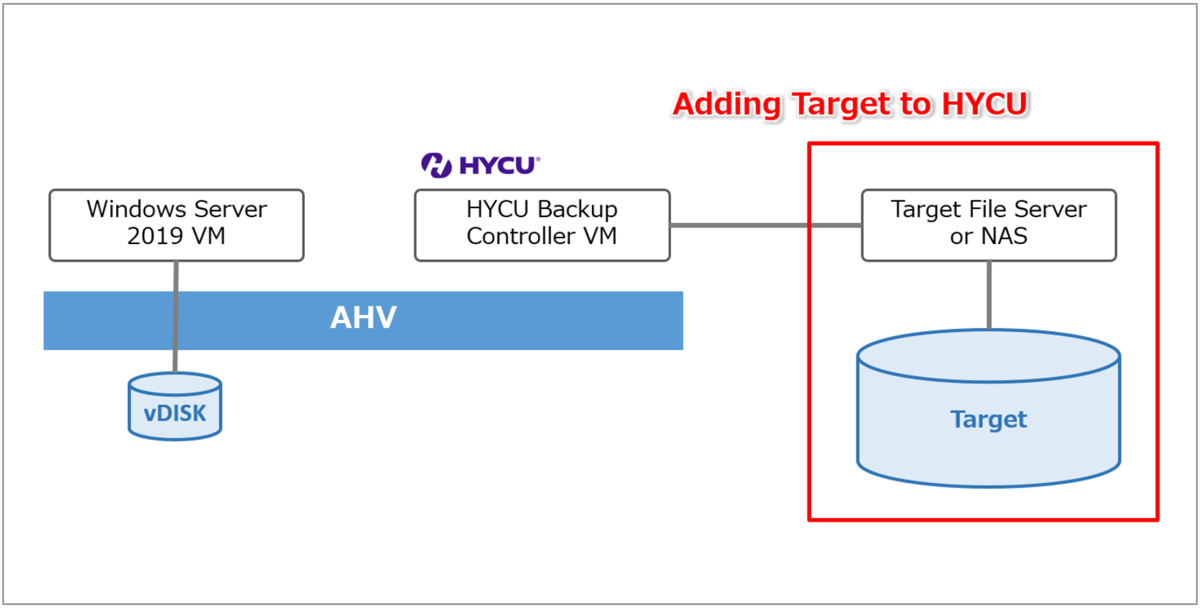
In the Part.2 post, I added Nutanix AHV cluster to HYCU.
At this time, I'm going to show how to add Target to HYCU as backup repository.
※The content of this blog is based on my own evaluation work and knowledge. Please follow the official documentation when actually installing and using the products.
Table of Contents
Environment
Platform: NX-1465-G5
AOS: 6.5.1.5 LTS
AHV: 20201105.30417
Backup Tool: HYCU Backup Controller(4.6.0)
▽Overview
At This time, I created SMB share on another Windows Server, so that I'm going to add the share to HYCU as the target repository.
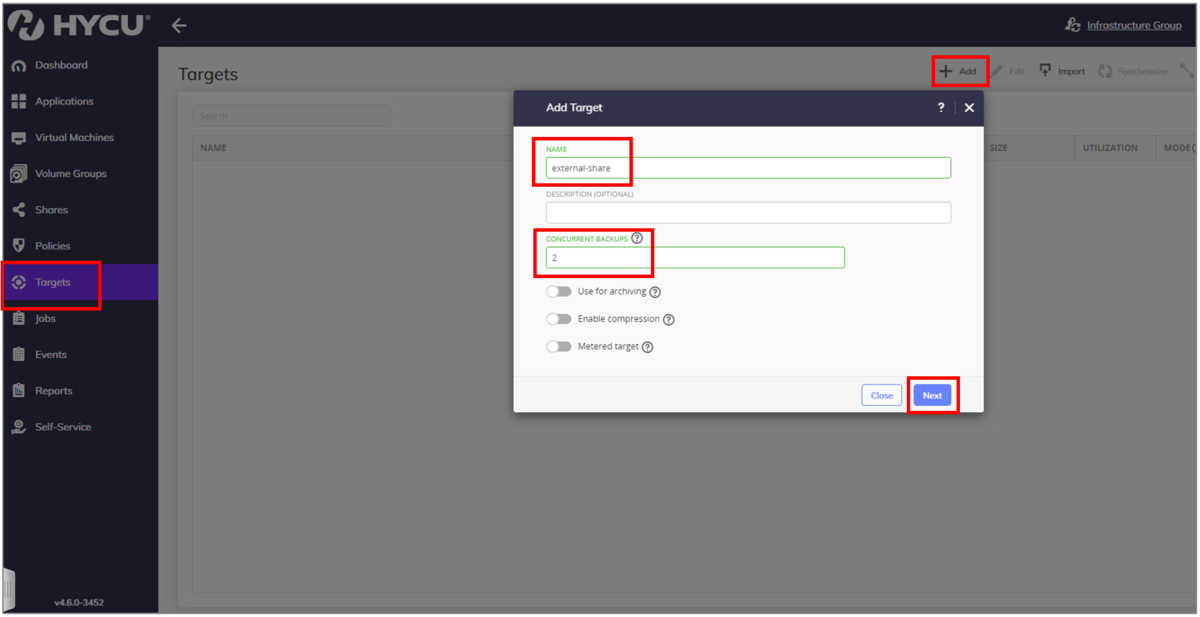
1. Adding Target
▽Launch Add Target dialog on HYCU web console. Enter any target name and click on Next. (Leave Concurrent Backups default 2 this time)
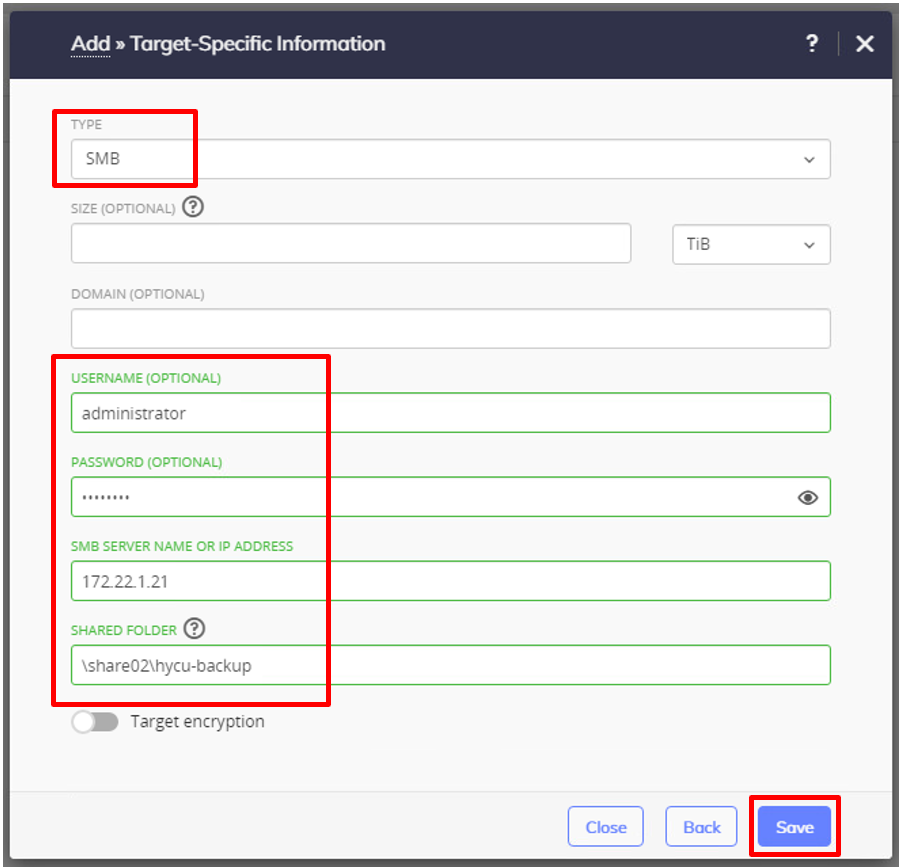
▽Select SMB and enter Account info, IP, Path for shared folder, then click on Save.
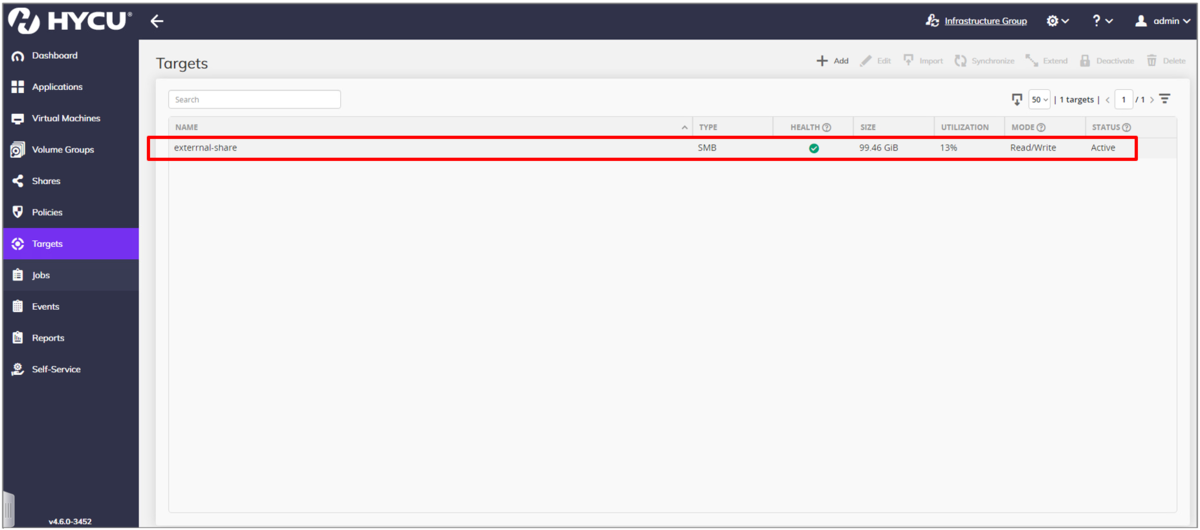
▽Added target displayed.
Thank you for reading! Hope it will be useful for you!
<Reference>
HYCU User Guide >> Setting up an SMB target
https://download.hycu.com/ec/v4.6.0/help/en/HYCU_UserGuide.pdf